
Hi, this is Karen back with my column, Music +1. This week, I will be giving a tutorial on how to make a cover song on GarageBand with an iMac!
For this post, I decided to use the song “Wave” by R3HAB X f(AMBER+LUNA).
First, you must find the tempo and key of the song. If it is a well known song, then you might be able to just search on Google for the tempo and key. But if the song is not very well known or you just want to be precise with the tempo and find out for yourself, then either download a metronome app on your phone or do what I did below.
1. Click here for the online metronome that I used.
2. There is a button under the huge “START” button that says “TAP here for custom tempo”. Click on that, and it should tell you to hit either the spacebar or “enter/return” key on your keyboard. You will need to play the song and hit the spacebar every time you hear the quarter note beats according to the song.
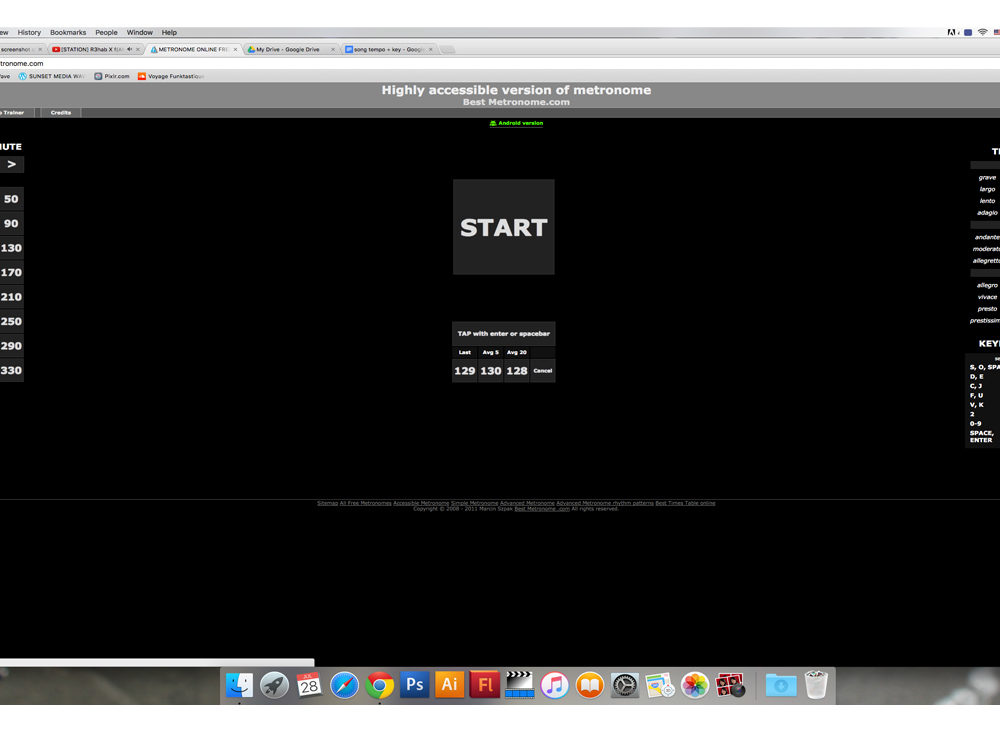
For this particular song, the tempo is 128 Beats Per Minute (or BPM), as the third box states. You might want to check if the tempo is exactly the same as the song itself. This can be done by playing the song and then playing the metronome tempo along with the song. If the tempo is correct, then the quarter note beats should sound exactly the same on both sides.
To figure out the key, if you have a piano or keyboard, just play the song’s melody along with the song to see if they sound exactly alike. You might even be able to search it on YouTube by searching “[Song Title] piano.” If neither works for you, you may be able to simply search on Google “piano online” or “keyboard online” for the song, and it should return with links to pianos that are playable online.
After that, you would want to write down the tempo and key somewhere in case you forget it.
Now, it is time for the cover making!
Connect a keyboard to the computer, and open up GarageBand. You should see a page like this:
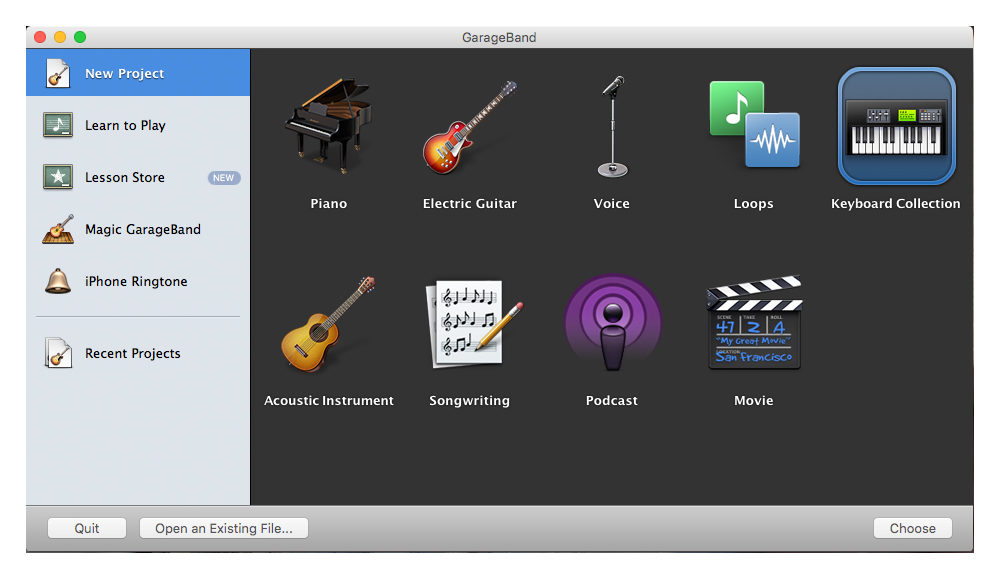
1. Select “Keyboard Collection” and click “Choose.” After selecting, you should get a window that looks like this:
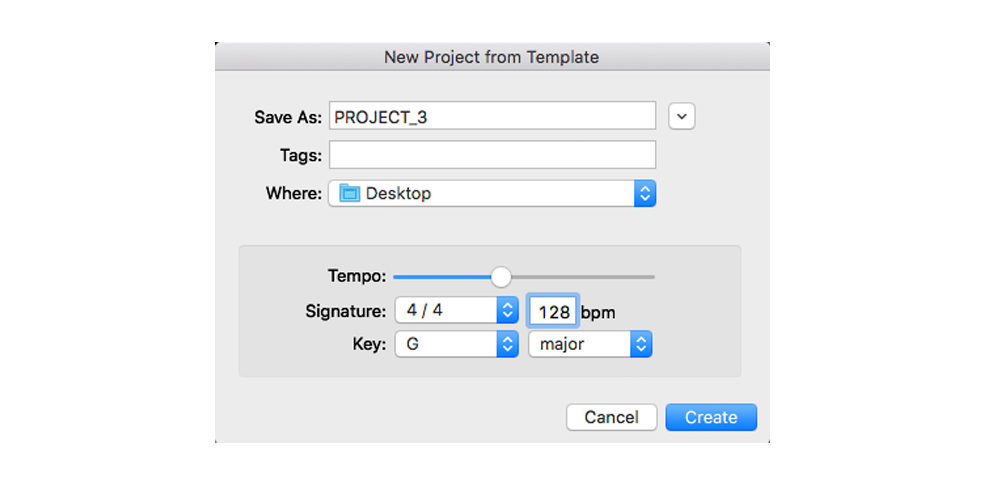
2. Enter in the key and tempo you just figured out. Select “Create.” After that, you should see a page like this:
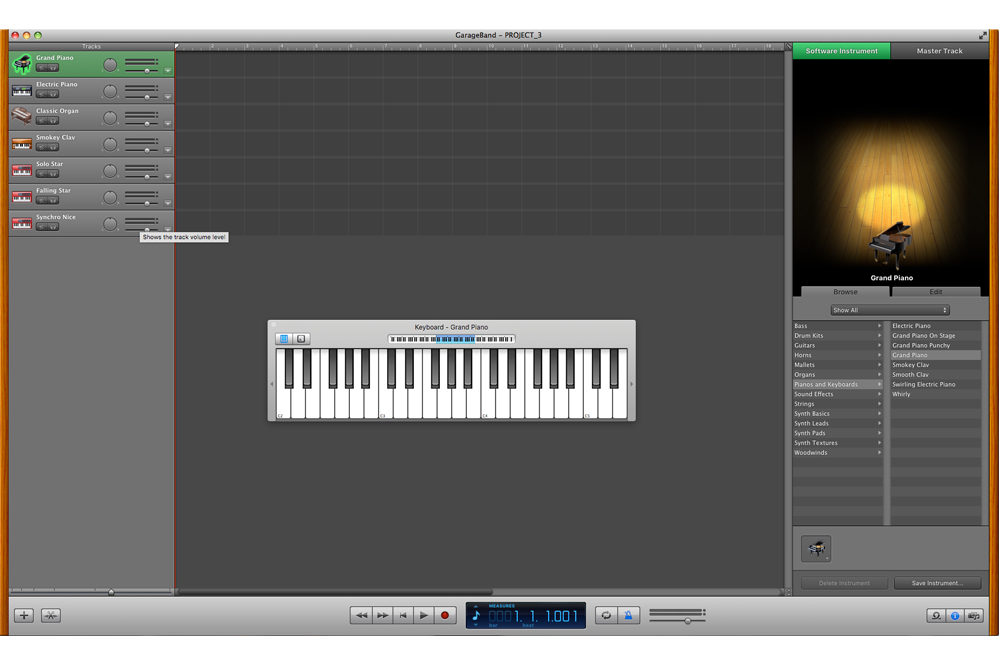
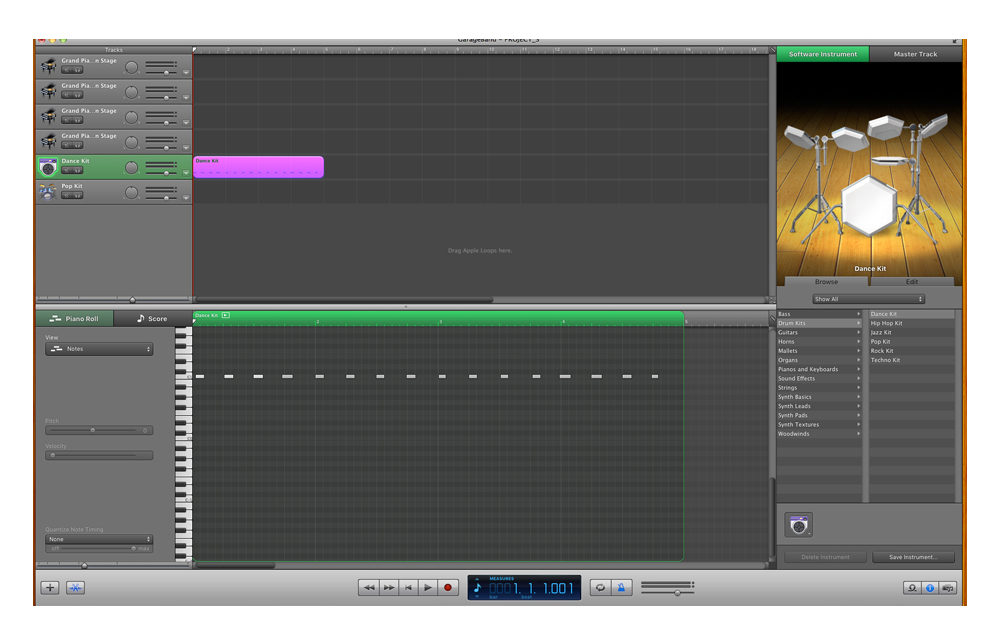
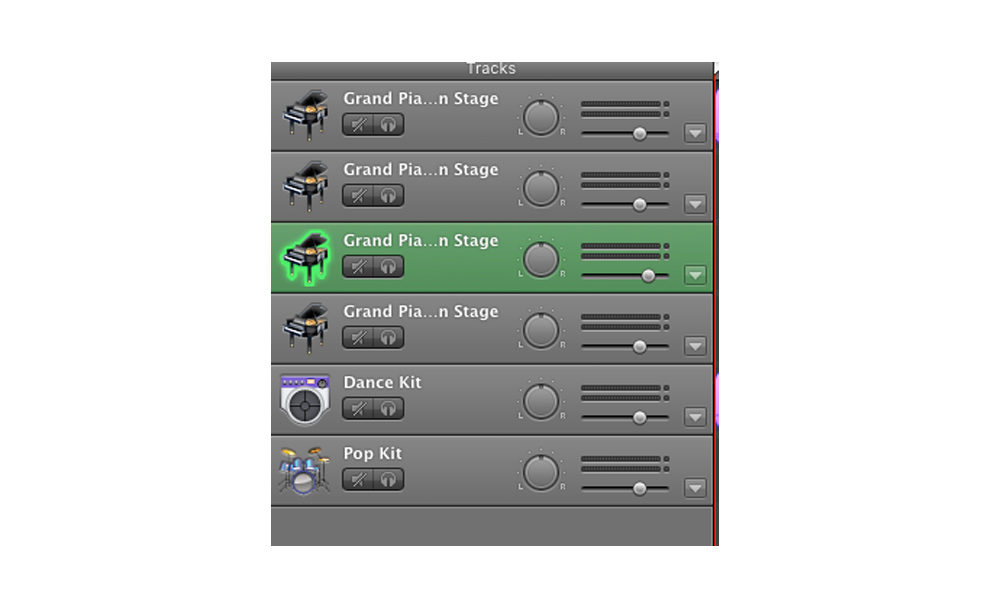
3. You will see that there are some default instruments on the left side of the screen. If you want to change them, simply go to the right side of the page and select the instrument that you want.
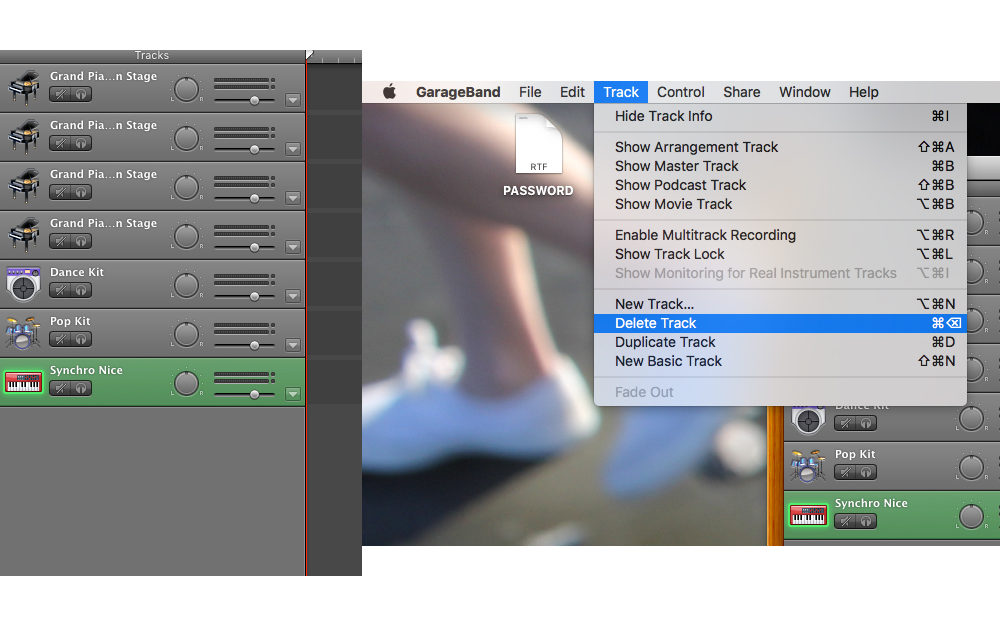
If you want to delete a track, you first select the track you want to delete, and then go to the top-left of your screen and select “Track,” and then “Delete Track.”
If you want to add a track, go to the bottom-left corner of the GarageBand window to the plus sign. And when you see the new window , select software instrument and then hit “Create.”
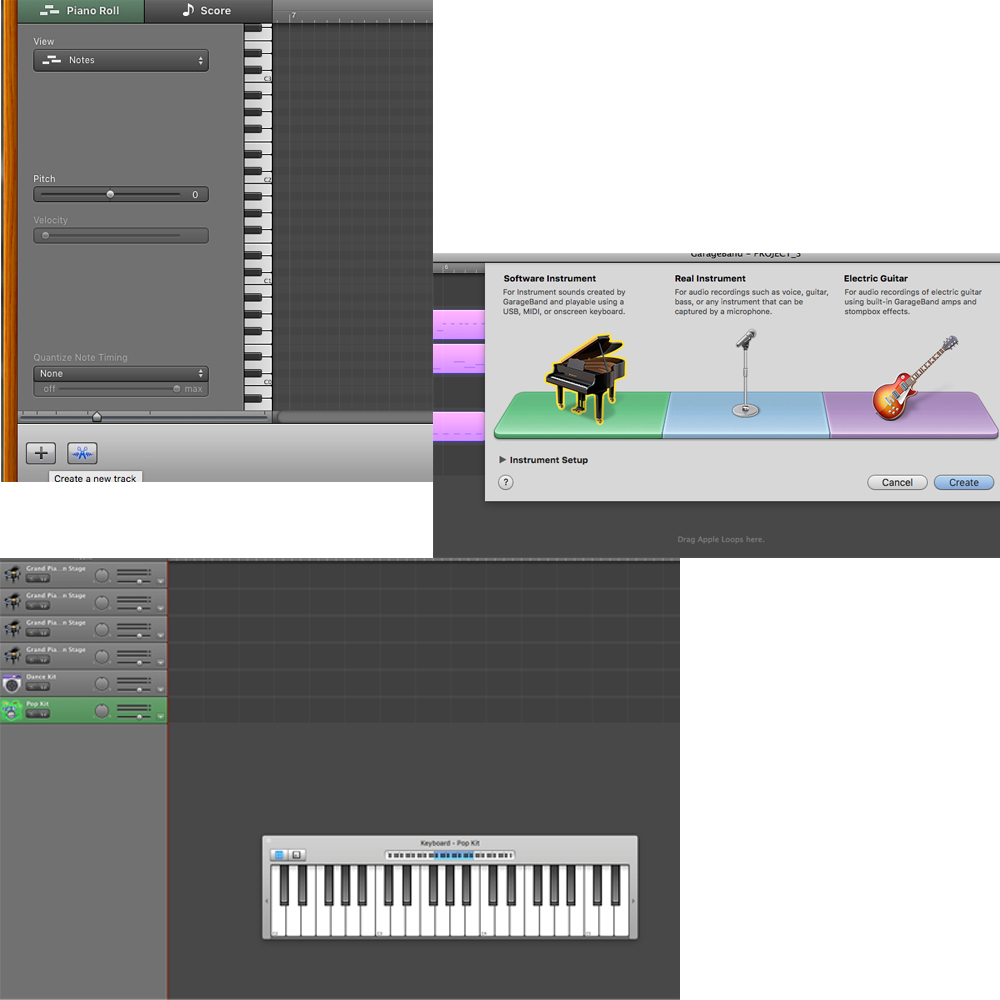
When you double click on a track, you will see something slide up from the bottom. This will be your piano roll and score.
On the very bottom of the window, it has a display window that shows the measures and the beat that you are on. In this particular image here, the button that is in blue is the one that enables the metronome. You will use it when you record your cover and you can turn it off at any time you want by just clicking on it. When the metronome is off, it should be gray and not blue. The button that has a red dot in the middle to the left of the display window is the record button.
When you click the record button, you will be able to record everything you play onto the track that you have selected.
I started creating the cover by creating a simple beat for your song.
You will see that everything you played is displayed on your piano roll. Make sure that all the hits are in line with the beats in a measure. Here, you are also able to change the length of each note in the piano roll after you finished recording.
After creating the beat, you will be able to change the length of each hit. You can also loop the recording by going to the right corners of the recording, then holding it while sliding to the right until the loop is the length you want.
After creating the beat, make sure you have enough tracks to record the different parts of the song. Here, I have one track for the upper bass, one for lower bass and other special effects (for example, if you messed up during one recording and found out a lot later, you can delete that section and re-record using the lower bass line), one for the melody, and one recording line. The recording track is used for recording while listening to what you have recorded already. If you don’t have a recording line and record right on top of the track you already have as melody, you will lose what you have already recorded.
Next, you can create the counter melody or “upper bass,” as mentioned before, using the exact same method I introduced before, you can start to record the track.
Of course, the notes might not be exactly in line with the beat itself, so you should change the length of the note and move it around. You can even change the velocity of the note if it is too quiet or too loud.
After creating the bass line, you can start to create the melody. When you record the melody, listen to the bass and the beat. This step must be done carefully because if you mess up, you might end up deleting the whole recording. And yes, you will end up recording the same section a few times until you think that you are satisfied with the recording you have.
If you want to delete a certain note, simply select that note, and click delete on your keyboard.
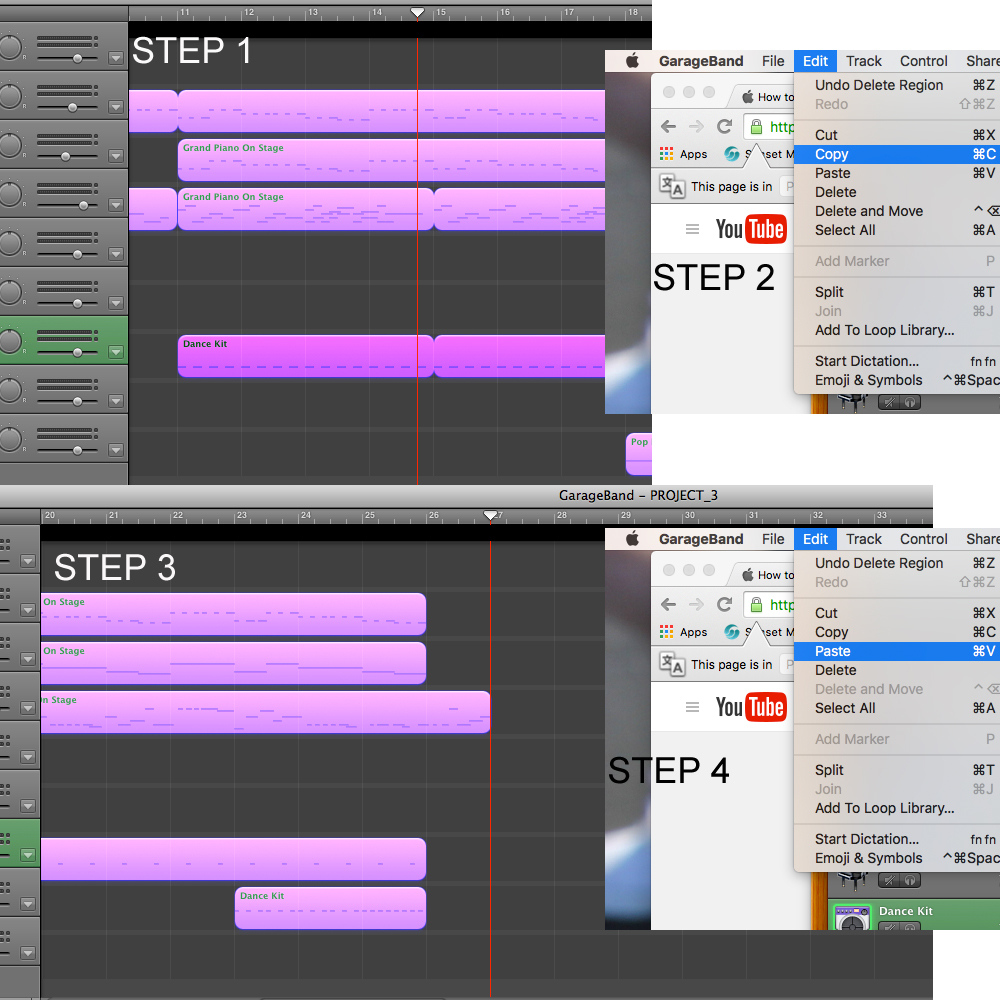
If you want to copy and paste a certain track to a specific place, select the track, go to “Edit,” and then select “Copy.” Then, move your measure reader to the measure you want, go to “Edit,” and then select “Paste.”
Remember to save your project once you think you are satisfied with your progress, that way you don’t lose what you’ve been working on.
Because the song I chose is an EDM song (EDM stands for “Electronic Dance Music”), a main part in the counter melody will be changed to a different instrument, rather than keeping the song completely as piano with beats (as my previous projects have been).
After you are done with the cover, make sure to listen to it a few times to see if there are any places that might need to be changed.
Being done with all the recording is only the first part! Stay tuned for my next post and for the last part of making a cover!