Hey guys! I’m back with some photos so you guys can see the behind-the-scenes process of building 1402 Post Street out of LEGO.
As I’ll be basing this build on a real-life Victorian house (which was featured in my first post, here), some of the work has already been cut out for me. Despite this, there’s still some things I have to figure out—how to get the angles in the bay windows, the tiny detailing, and the leveling of the stairs—and this is just for the first level of the house.
I recently got a bag full of light bluish gray curved bricks, which will come in handy later for the curved bay windows. Along with those, I have a variety of white window frames.

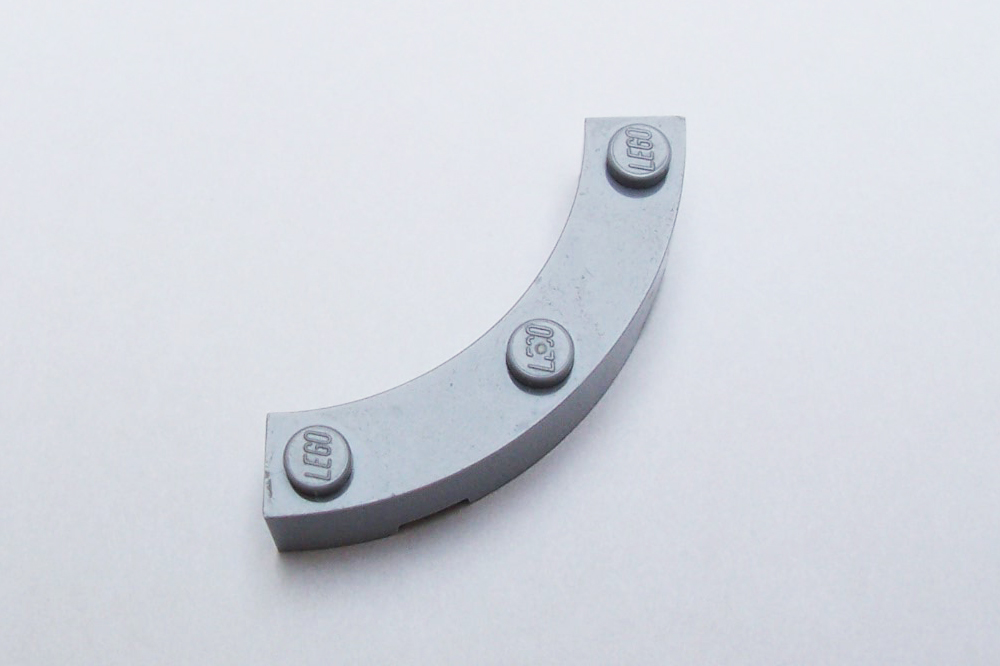
To get the nice angles in the smaller bay windows, I got some hinged plates (left) and bricks (right). Note that plates are exactly a third of the width of the bricks.

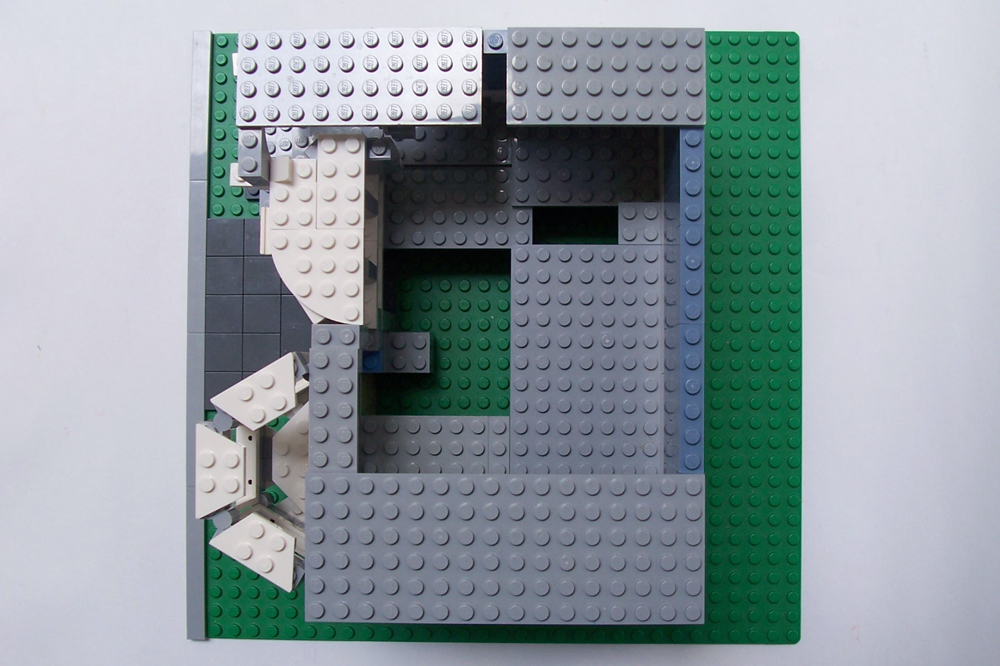
The house itself is going to on a 32×32 baseplate. I originally intended it to be on a smaller base, but it didn’t work out—honestly LEGO building is a lot of trial and error. The first thing I did, and this goes the same for any project, was to set the foundation. In LEGO terms, this just means designating the sidewalk and the walls of the building. After that, I just jumped right into the building process.
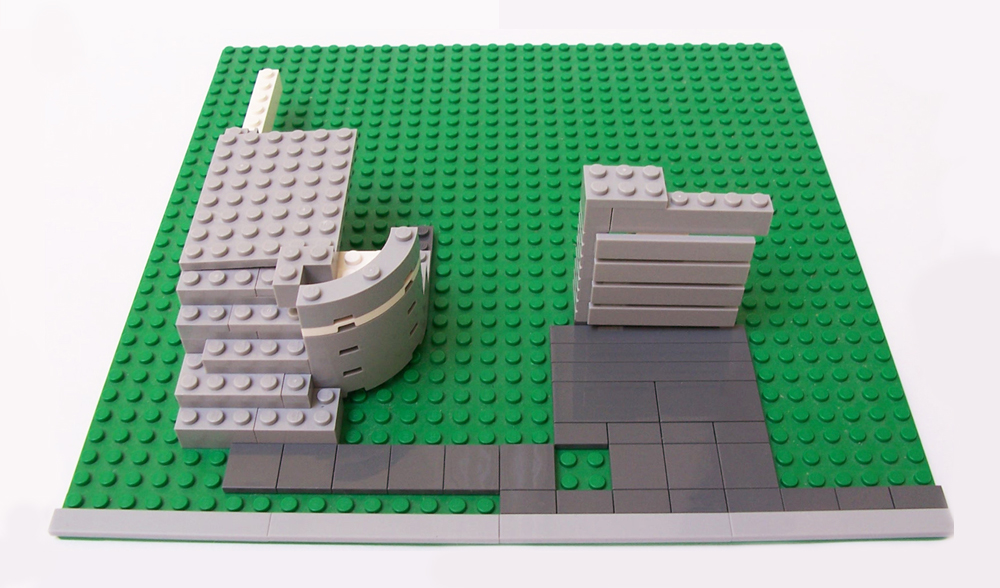
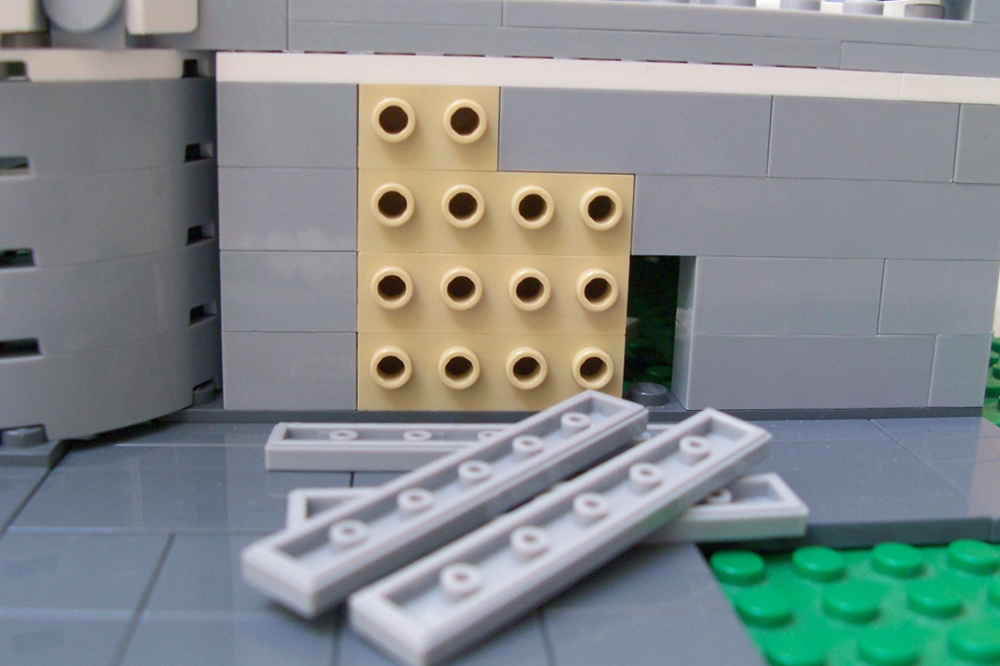
After a while, I had some designated sidewalk in and the general layout, but I still left a bit of space to shift some things around while I still could. At this point, I’m still figuring out how to level the stairs so that the curved part rests nicely on top. The garage was fairly easy; it is composed of a couple of tan SNOT (Studs Not On Top) bricks as shown below.
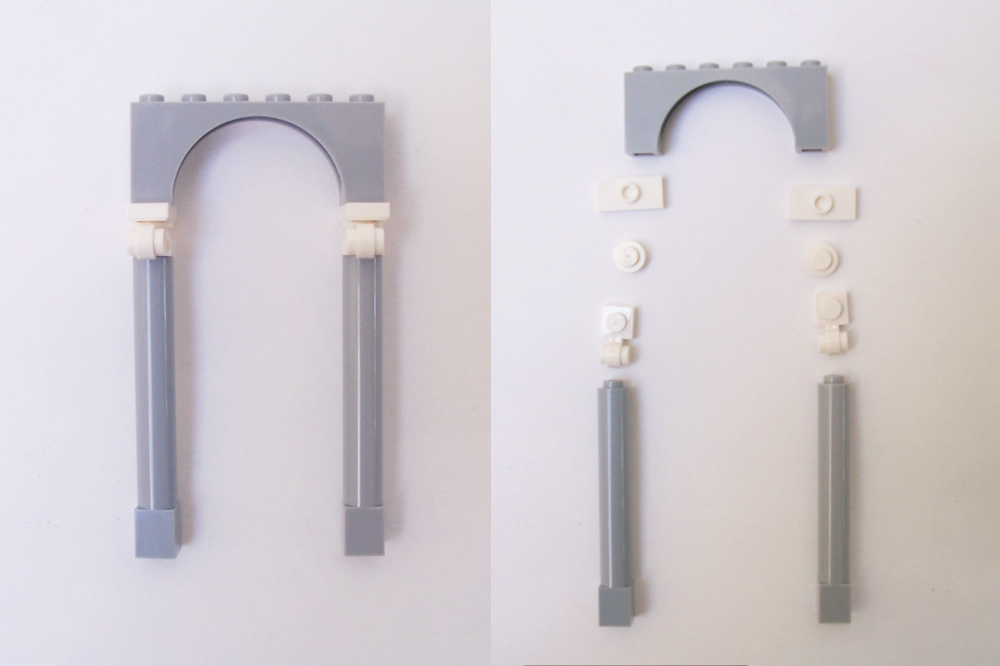
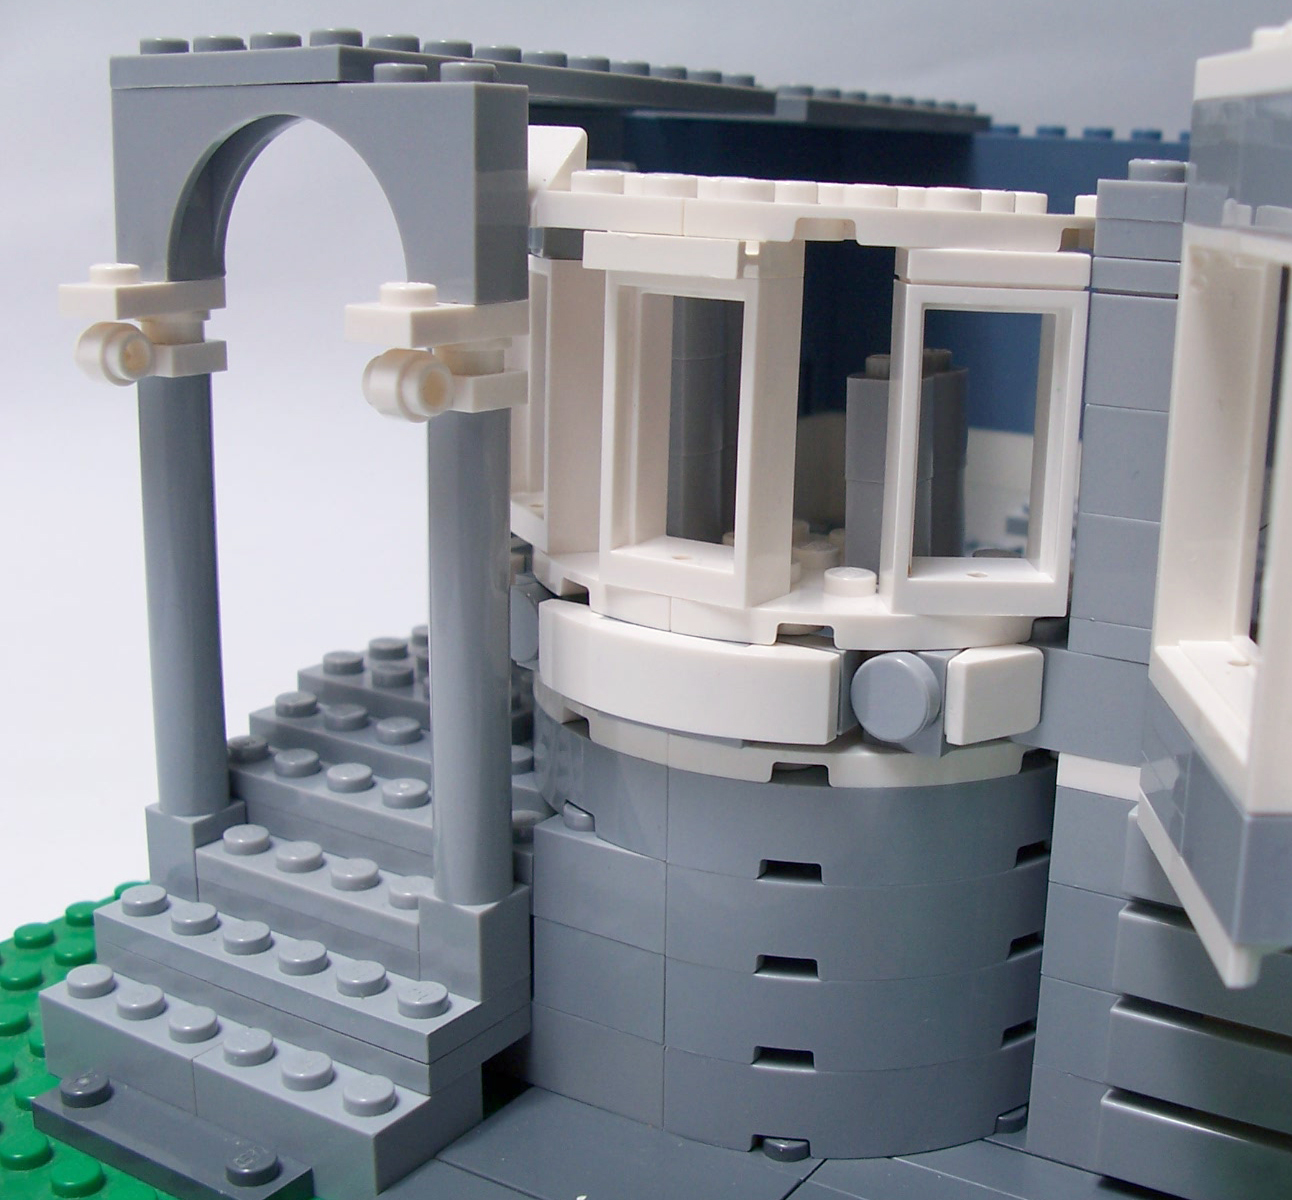
Next I had to incorporate the arch element I constructed using a variety of plates.
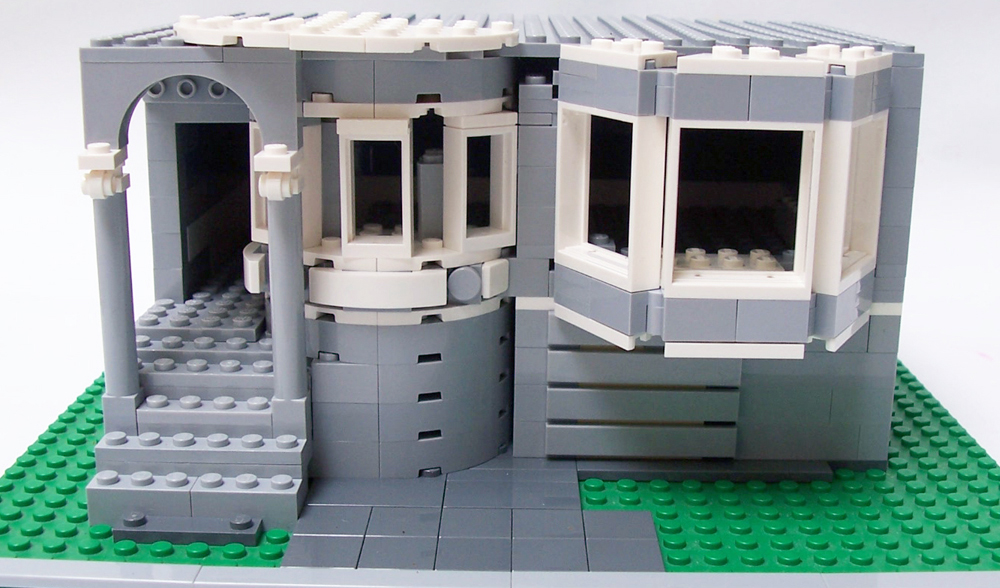
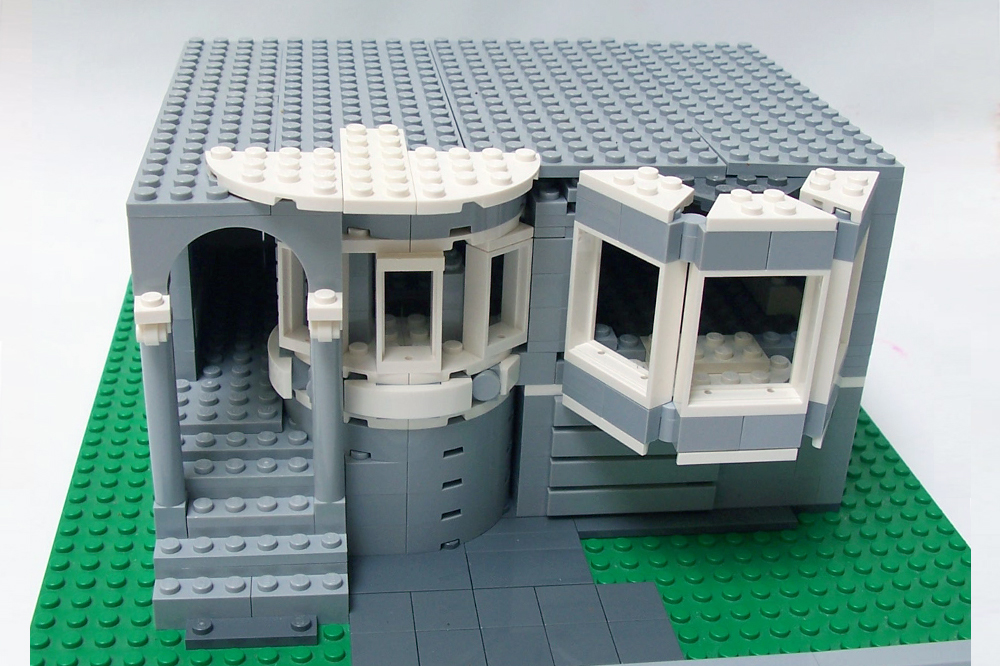
After I placed in the arch piece, I started to figure out the window placement of the first bay window. Here, I’m using the slimmer 1x2x3 window frames. Below the windows, I tested out some detailing to mimic the panelling on the real house. Still, I’m not entirely satisfied with it, so I might change it later. One of the beauties about LEGO is that you can always take it apart afterwards and make it even better than it was before.
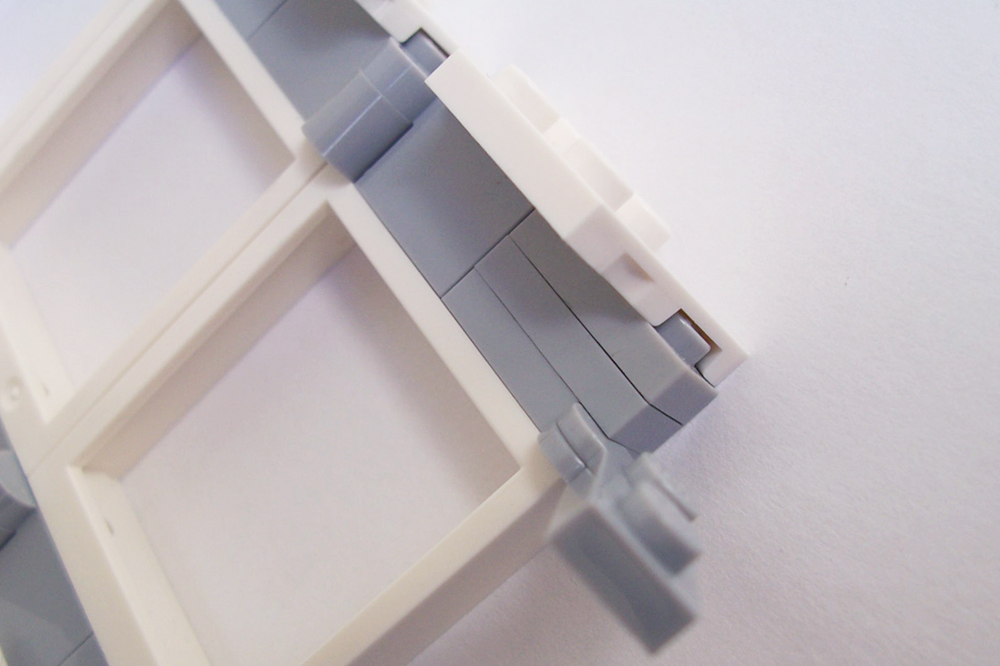
Now onto the second bay window, where I used both the hinged plates and the hinged bricks to get the angles of this iconic San Franciscan style.
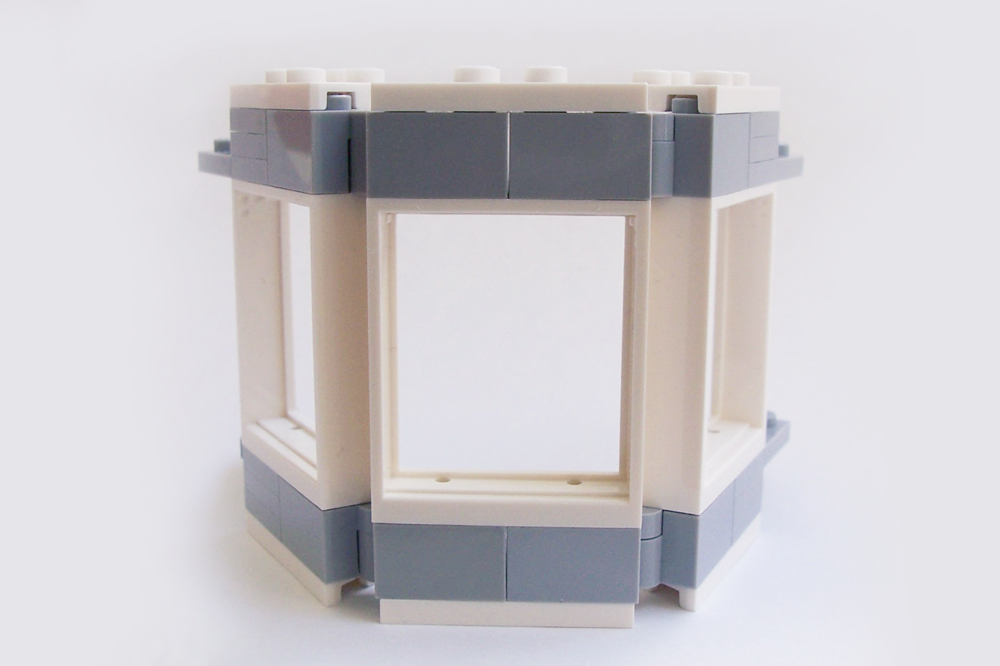

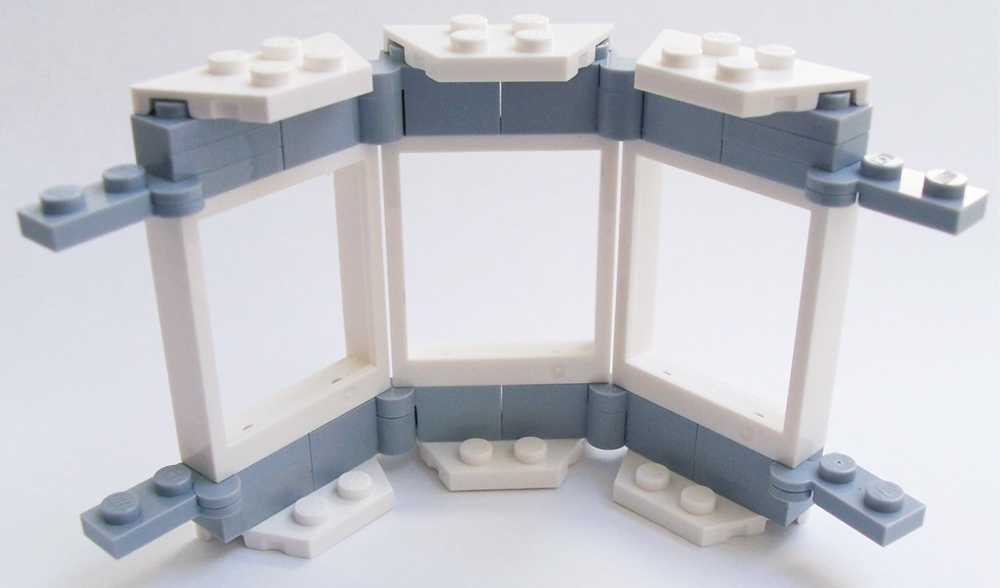
The front panel uses the hinged bricks, but the other two panels use hinged plates.
When I installed the bay window, I realized that it looked out of scale compared to the rest of the building.
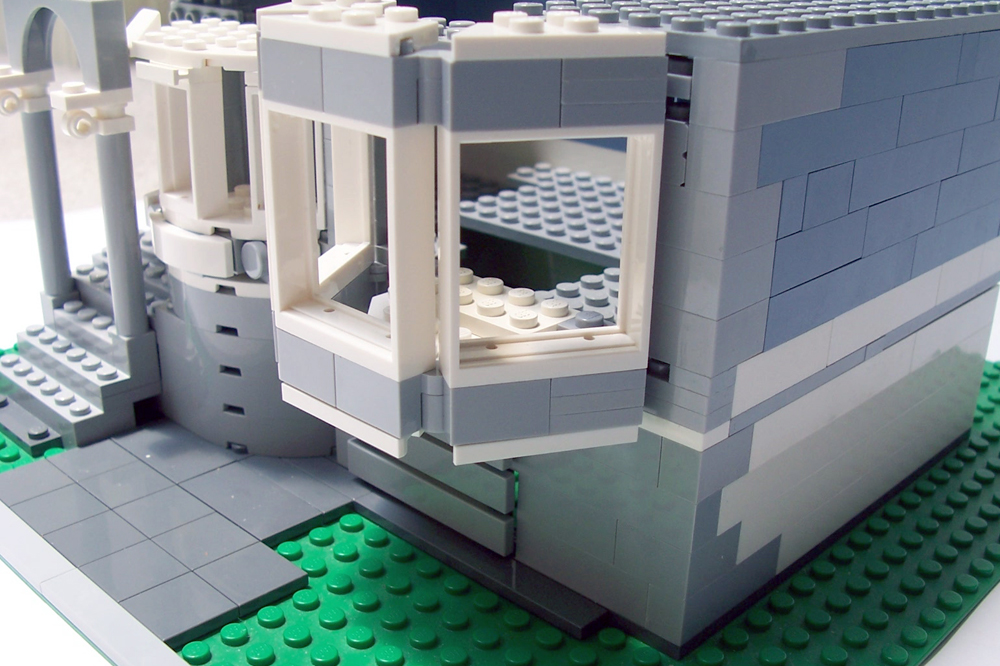
Other than that, I think it fits well, plus it’s easy to replicate without eating up my LEGO collection.
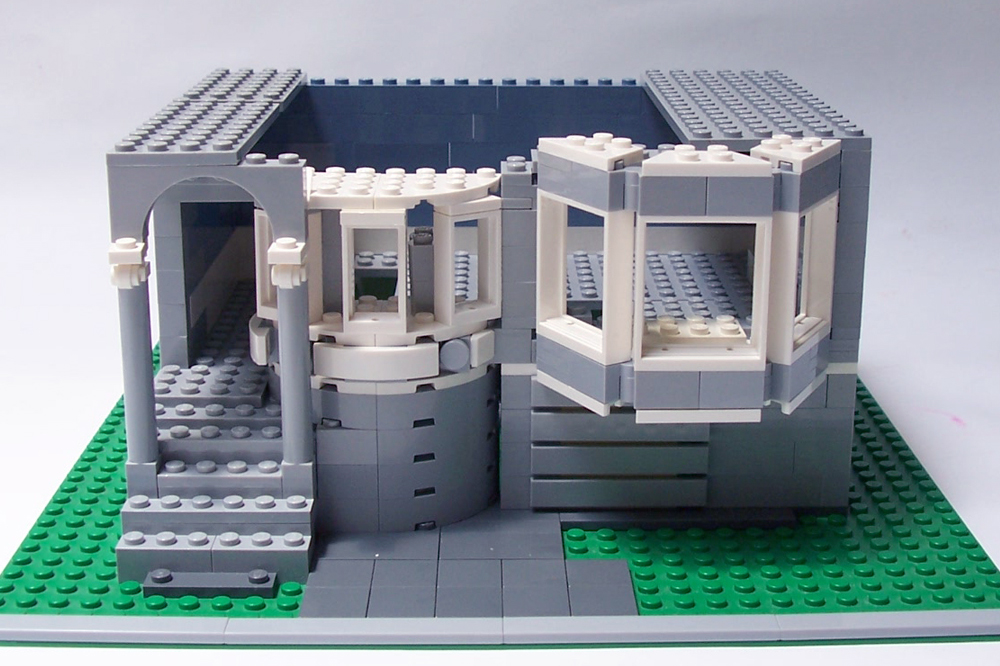
With that done, all that was left was for me to secure the windows and lay down some flooring for the second floor.
I was kind of lazy with the flooring on the first floor, but this time I was determined to cover the entire floor.
Below is a side-by-side comparison of my LEGO version (so far) and the real life Victorian house.
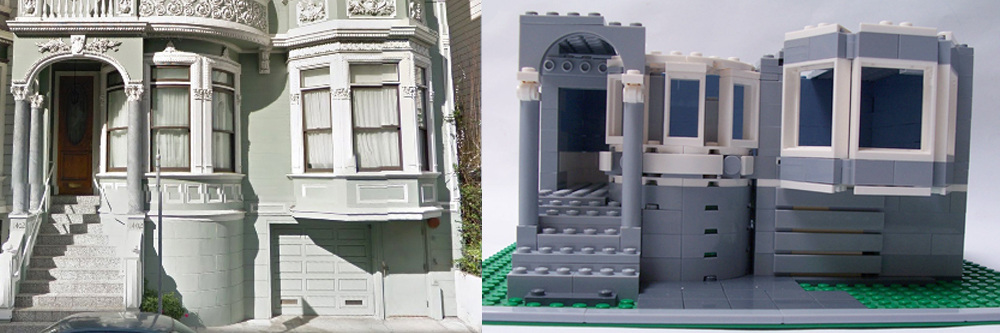
Now with the first floor is complete, stay tuned for the next post as I continue to build my LEGO Victorian house.